Create and secure your account
- Open Register from the website. Enter your name, email and password (at least eight characters), and accept the terms.
- Check the verification email, then sign in. Mail delivery must be configured by the operator; local tests do not prove delivery.
- Use Profile to update account details and password. Review marketing preferences separately from rendering controls.
Your website password is used on the website, not in Blender. Select Access Tokens in the website sidebar. Create a named token for each computer and choose an expiry of 30 days, 90 days or one year. Copy the token when it is shown: it will not be displayed again.
Manager / Render App Access is a separate section on the Access Tokens page, visible to authorized backend accounts. Those tokens cannot connect the Blender add-on, and add-on tokens cannot access Manager, Render App or administrator APIs, even when the account has an administrator role. Creating or revoking an add-on token leaves backend tokens unchanged.
Never include a token in screenshots, Job titles or support messages. Revoke lost or exposed tokens from Access Tokens and create replacements.
Install and connect the Blender add-on
- Use the signed-in website's Blender add-on download. If the configured version archive is absent, contact the operator rather than using an unknown build.
- In Blender Preferences → Add-ons, use Install from Disk for the downloaded ZIP and enable Freedom Render Farm. Blender menus can differ by version.
- Open the add-on's Account Connection section. With no stored token, it shows the Add-on Token entry, Remember in secure storage and Connect. Paste the token created on the Access Tokens page, then select Connect.
- Read the connection result. Once a token is stored, the entry box is hidden and Check Connection and Forget Token are shown. A stored token alone does not prove it is still valid; Check Connection contacts the website.
- Website Link opens the configured website. Manage your tokens from Access Tokens in the website sidebar; there is no separate token-management button in Blender.
- Open Output Properties → Freedom Render Farm. Check File Data before ordinary submission. For multiple states, use the always-visible Multi-Render Guide button. It opens the guide on the configured website in your browser; guides are not bundled with the add-on. Production builds open the live website and test builds open your local development website.
When supported secure storage is available, Remember in secure storage saves the token in the operating system credential store. Otherwise Blender reports Session only, and you must reconnect after restarting Blender. The token entry is not saved in Blender preferences or project files.
Forget Token removes the local credential and brings back the entry box. It does not revoke the token on the website. To invalidate a token everywhere, use Revoke on the Access Tokens page. Forgetting a token does not delete prepared projects.
Installation metadata is not a compatibility certificate. Use the exact tested compatibility reference; currently no farm combination is certified. Worker installation, GPU drivers and server setup are operator tasks, described in the separate maintenance map.
Connection problems and production/test builds
- No stored token: create a Blender add-on token from Access Tokens in the website sidebar, paste it into Account Connection and select Connect.
- Invalid, expired or revoked token: select Forget Token, create a replacement on the website and connect again. Use a Blender add-on token, not a Manager or Render App token.
- Different website: production builds use freedomrenderfarm.com and require a token issued there. Test builds use localhost:8000 and require a token from your local development website. Tokens are kept separately by website, and Blender rejects a mismatched token before sending it.
- Local test server unavailable: start your local website, or export a production build if you intended to use the live service. Only developer/test builds display the server URL in Account Connection.
- Account not permitted: verify the account email and check account restrictions. A token does not bypass bans or disabled submission access.
- Session only: secure storage is unavailable or was not selected. Keep the token securely, or create a replacement when reconnecting. If secure storage is locked and Forget cannot remove a saved token, use your OS credential manager or revoke it on the website.
- Connection failure: check the specific timeout, DNS or secure-connection message. Do not disable HTTPS certificate checks.
For maintainers, the exporter still asks Production? when run without flags. Yes selects the live website and No selects the local test website. Command-line equivalents are python3 Export_Addon.py --production and python3 Export_Addon.py --test. Both write FRF_Blender_Addon.zip; use --output-dir to keep separate copies.
The token-based add-on and matching website changes must be released together. Older email/password add-ons cannot authenticate after the website changes are deployed. Updating these local guides does not deploy the live service.
Prepare and submit a project
Save the project, resolve missing dependencies, choose output settings, and ensure simulations/add-ons meet preflight requirements. Do not assume a working local render proves random-access farm safety. The Multi-Render walkthrough explains the frozen base and the complete settings reference explains allowed changes.
The add-on supports ordinary single submission and saved multi states. On Dashboard → Submit Render Job, enter Title and an HTTPS Dropbox or Google Drive file link in Project URL. The Manager first checks that the project is a Blender file, then reads its saved Blender version and render engine. Open Custom settings to override Software, Software Version, Engine, frame range, or resolution; leave fields unset to use the project settings. Folder/transfer links and other hosts are rejected. Select output settings; Custom Settings exposes frame range/step and resolution. Choose Submit Job and wait for the confirmed receipt before using Submit Another Job. This creates a single Render ID and does not author Blender multi states. An uploaded source may still require server preparation and validation before execution. Capability gates may reject new multi submissions while compatible single submission remains available.
Do not resend with a new identity simply because a response was lost. Use the prepared submission retry and receipt where available. Existing receipts remain valid when admission is disabled.
Find Jobs and manage work
- Dashboard lists Jobs and counts Render IDs separately. Uploaded Jobs shows submission history. Existing single-render child links continue to work.
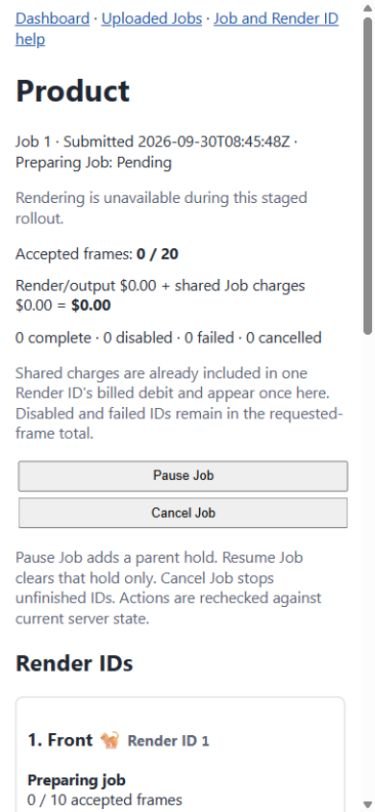
- Open Job and expand a Render ID to inspect accepted frames, status, timestamps, settings, cost and errors.
- Use the server-offered parent or child action. Read affected/unchanged/blocked results and activity history, especially after a stale-page response.
- Refresh and recheck the state before retrying. A sibling's failure does not require cancelling the whole Job.
Read status and waiting help and stage-specific recovery. Local draft edits in Blender do not update an already submitted Job. Job detail polls every 30 seconds; an older observation is not fresh worker evidence.
Pay for rendering and review charges
Credits shows balance and transaction history. Top Up opens the configured payment workflow. Wait for the website to record payment; a checkout window alone is not proof of credit. Payment provider/webhook delivery and real refunds remain external verification prerequisites.
Review per-ID execution/output costs and the single shared Job charge total. Preserve transaction and Job identifiers for disputes. Insufficient credit holds new rendering account-wide. After credit is available, explicitly resume eligible work; other holds and disabled IDs remain. Refunds require the administrator workflow and do not silently rewrite accepted work history.
Download and retain your results
- Open the Job or existing render detail link.
- Choose a ready ID's available output/ZIP-part links. Download all parts required for that output.
- Verify the files and keep a local backup. A partial download contains only currently published outputs.
There is no parent completion barrier. Another ID can keep rendering while you download. Unpublished or unavailable artifacts must not be treated as ready. If a link fails, reopen the detail page; if storage data expired, a new URL alone cannot restore it. See timing, costs and retention.
Additional roles
Render-node accounts
Authorized node accounts can settle recorded earnings and request a payout from Credits when the controls permit it. A disabled payout control can mean no eligible amount or an existing pending request. A request is not proof of payment. Node credentials are also used by authorized worker tools; this does not provide administrator access.
Administrators
Admin access is restricted to the administrator role. The administrative area includes financial reporting/export, refund handling, payout completion and a database editor with protected canonical fields. Verify the account, amount and existing transaction before a financial action. Do not use database edits to bypass Job recovery or rewrite accepted frame/billing identity.
Marketing administration has campaign, image, social-account and default-setting workflows. Review recipients, content and configured providers before publishing/sending. Public newsletter preferences and unsubscribe links manage marketing consent, not Job cancellation. Real external payment, email and social delivery were not exercised for this guide.
Operators and maintainers
Managers, headless/GUI workers and Docker workers run outside the customer website. Deployment, migration, compatibility evidence, logs and safe recovery belong in the separately maintained maintenance map (technical text), not customer controls. No production rollout has been performed by this documentation work.
Administrator task walkthroughs
- Open Admin → Admin Control Panel. For a financial report choose the report, country, cash/accrual basis and period, then open the report and use its export control. A report is not proof of external settlement.
- Review pending payouts and transaction details before completing a payout or requesting a supported refund. Check the resulting record and provider result; do not repeat an uncertain financial operation as a new transaction.
- Open Database Editor only for authorized maintenance. Select the table and record, inspect permitted fields, and respect protected canonical fields. For render failures use the scoped Job recovery controls first.
- Open Marketing Posts to create a post/campaign or continue a draft. The Quick Marketing Assistant offers Generate This Week's Ideas, Continue Latest Draft, Duplicate Last Campaign and Make Social Posts. Review generated content and selected images before publication.
- Review social-account settings and marketing defaults before choosing Send Test Email or Schedule Approved Campaign. These controls can send or schedule real communications in a configured deployment. Check recipients and approval state before using them; this documentation verification did not execute those external actions.
The visible System Health Check button currently has no implemented action; do not interpret pressing it as a diagnostic result. Provider reports depend on configured integrations, and a local successful page render does not verify remote delivery.
Troubleshooting and support
Use the website's Contact Information for the deployed service. Include Job and Render ID, timestamp, failed stage, exact error and what you tried. Remove credentials and private project content. For credential errors follow Account Connection troubleshooting; for unavailable add-on downloads ask about the installed package version; for compatibility errors do not bypass the gate. For disk/backlog waits the operator must restore capacity; repeated submissions increase work rather than fix it.
Public homepage feature summaries describe the wider service; the versioned Multi-Render guide and current preflight govern this staged feature. In particular, arbitrary compositor File Output passes, cache families and engine/version combinations are not certified by a generic marketing claim.
Walkthrough evidence and release boundaries
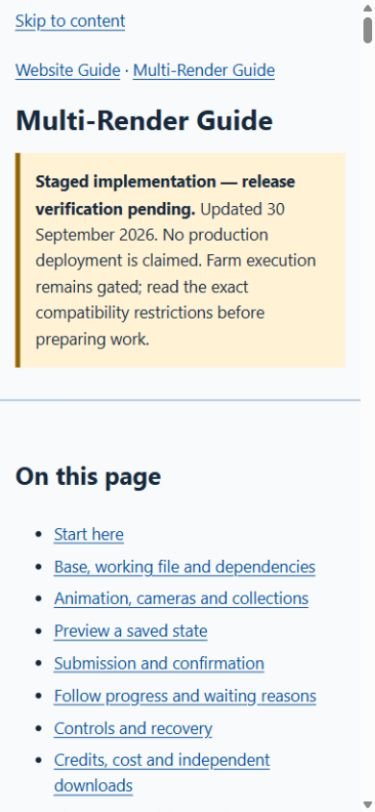
The linked screenshot shows an actual locally rendered guide, not a production account or completed farm Job. Website route/control fixtures use isolated data. Real Blender 5.2.0 Cycles CPU fixtures verify local preparation, saved-state application and preview; separate Website/worker tests verify receipts, per-ID publication and billing. Joining these boundaries in an installed end-to-end workflow is still pending.
The final checklist, maintenance map and cutover runbook are maintained separately in the source workspace. Production-version restored backup rehearsal, physical legacy drain, timed retirement, packaged GUI/Docker/GPU validation and real storage/provider checks remain explicit release gates. Pending later cleanup does not block reading guides for verified behavior.